Hawke 30 SF Compact IR Airmax, Ill. AMX
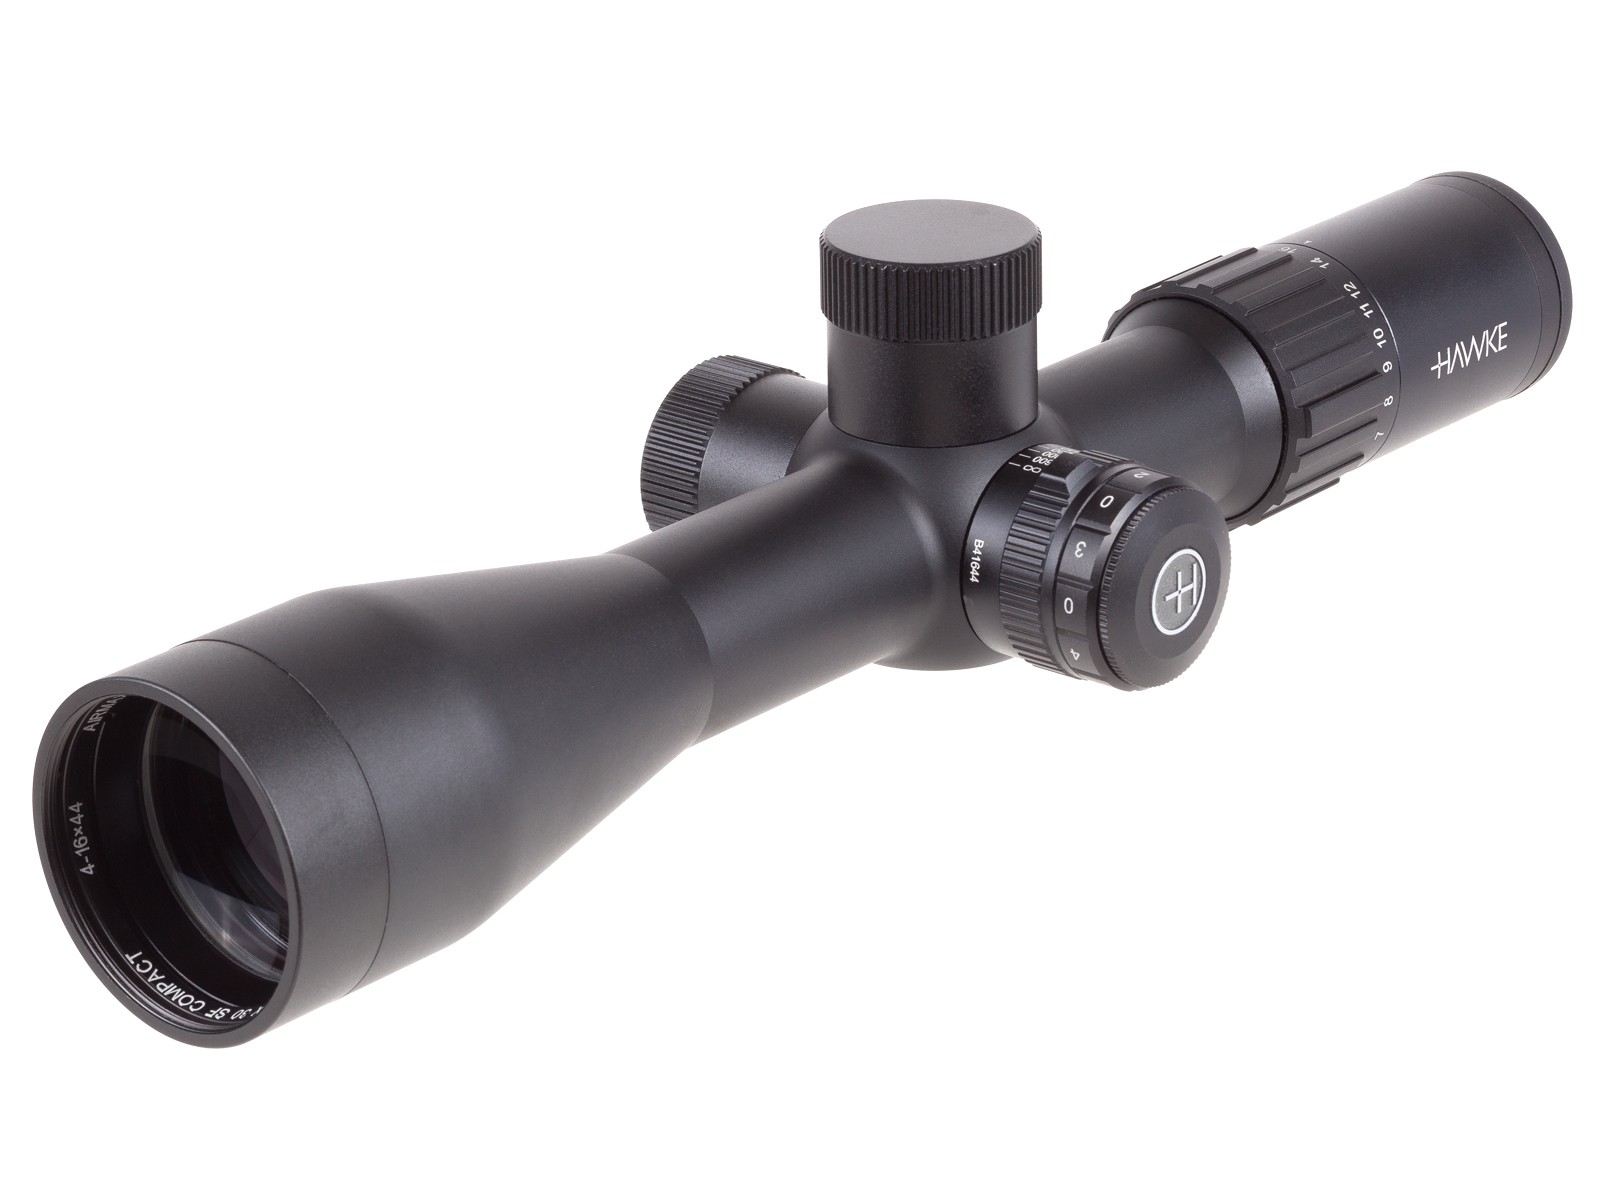
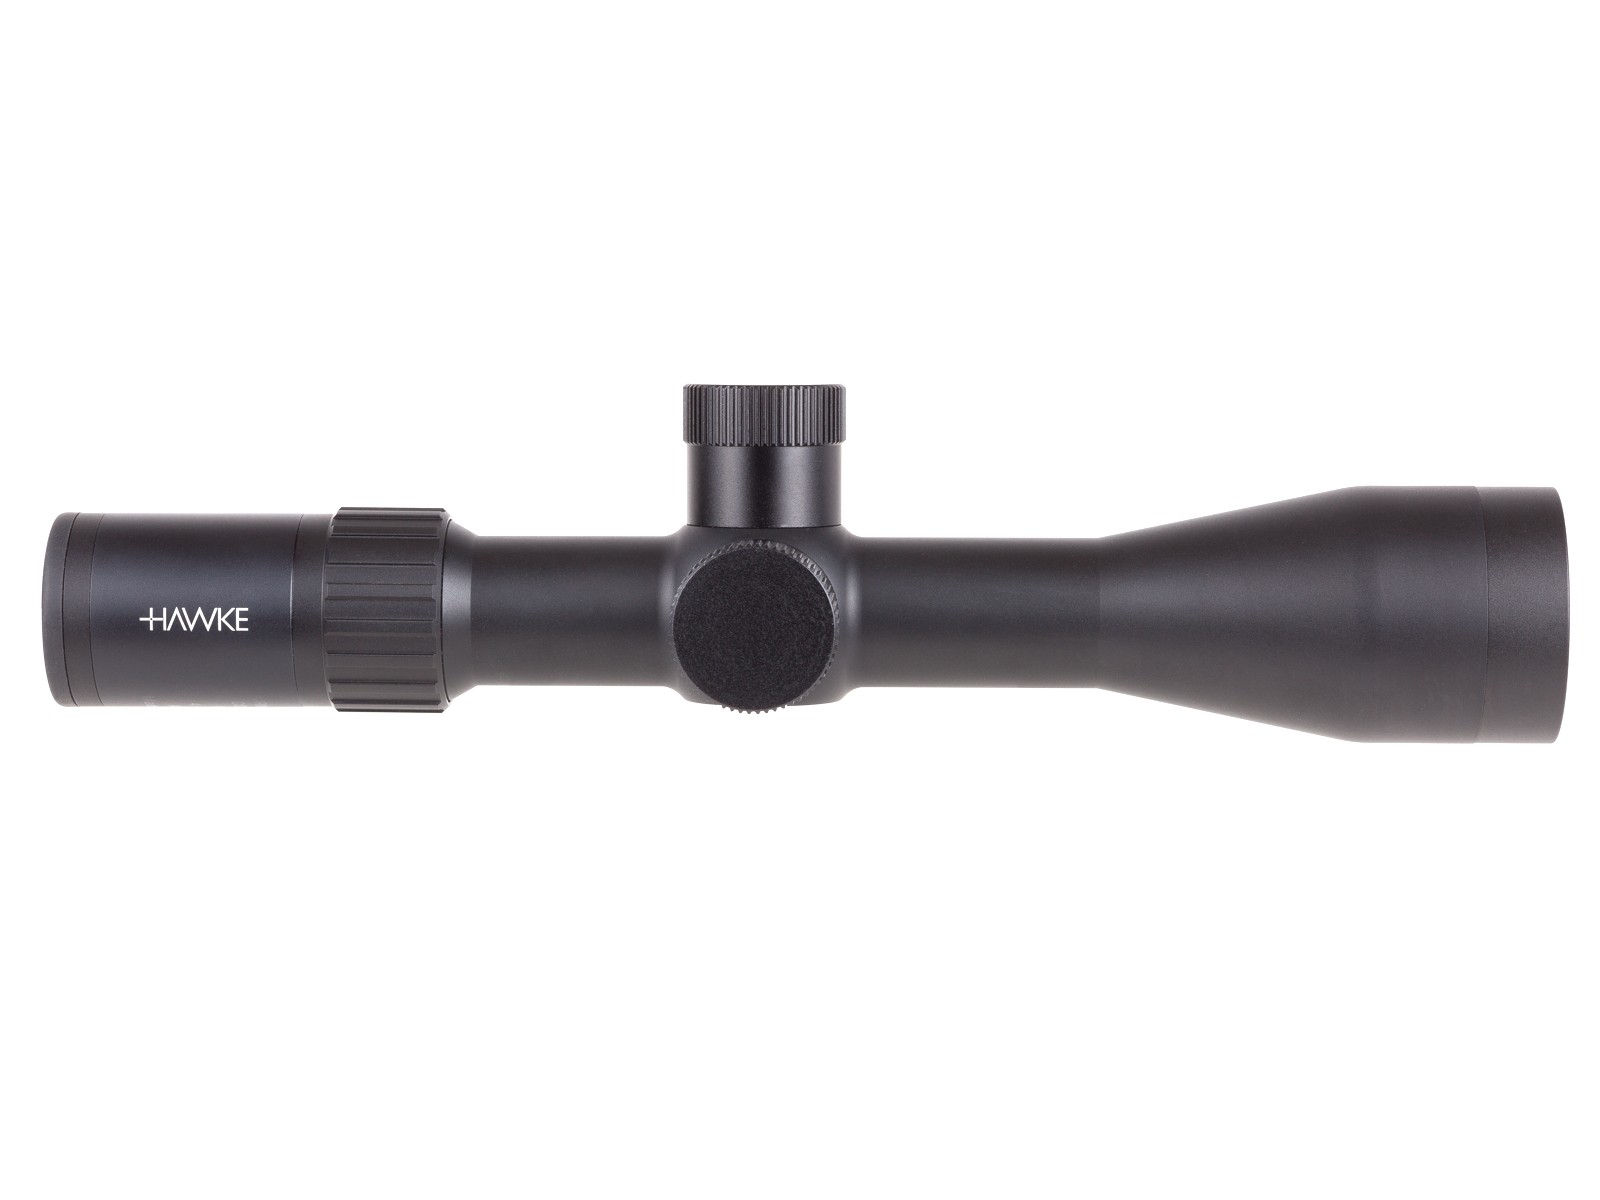
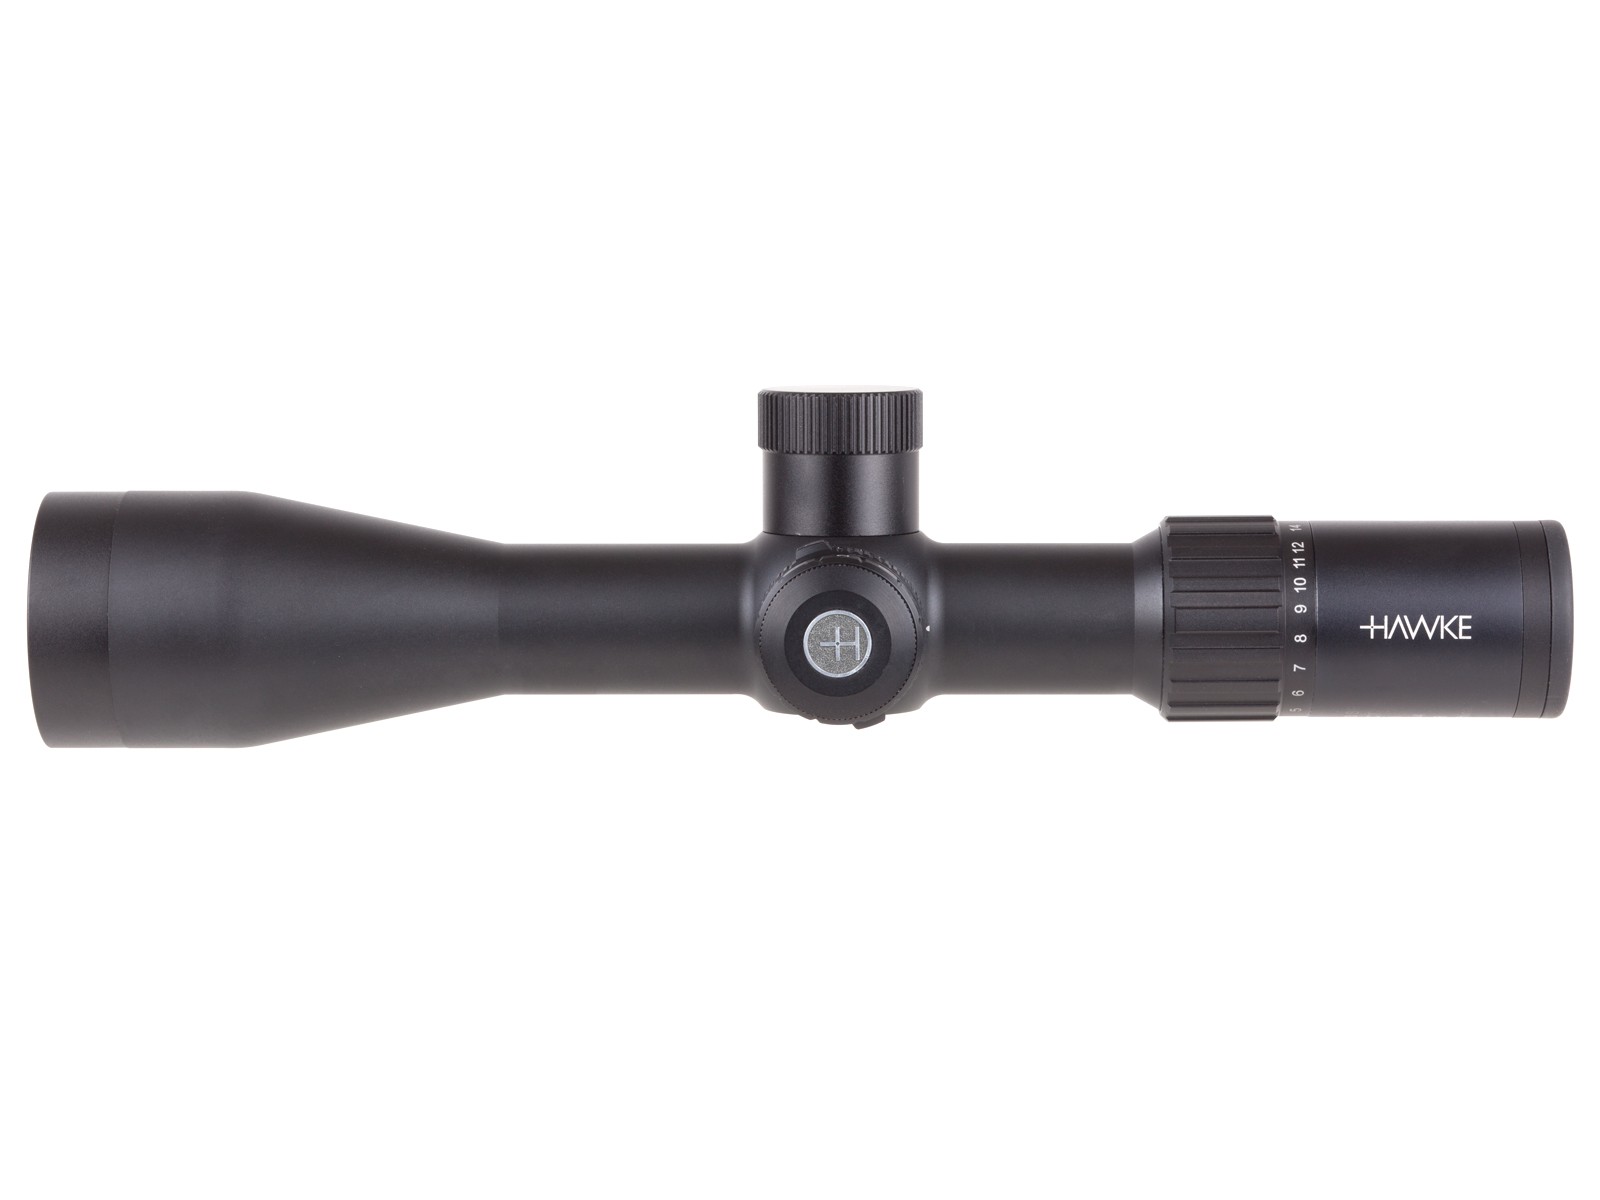
The Hawke 30 SF Compact IR Airmax, Ill. AMX is an optical sighting system developed around a compact chassis, side-focus adjustment, and an illuminated AMX reticle. Its configuration is intended to provide a balance between optical clarity, manageable overall size, and precise visual reference points. Because the design combines a 30 mm main tube with an adjustable side-focus system, the scope can be configured for a wide range of viewing distances while maintaining a relatively streamlined profile.
Built around Hawke’s Airmax optical platform, the Hawke 30 SF Compact IR Airmax, Ill. AMX places particular emphasis on image definition, reticle visibility, and practical adjustment controls. The illuminated AMX reticle provides multiple reference points that can be used for consistent aiming calculations, while the side-focus mechanism allows parallax correction to be adjusted without changing the shooter’s primary position behind the optic.
Compact 30 mm Optical Platform
A 30 mm main tube is used throughout the scope body. As a result, the internal adjustment system is given sufficient mechanical range while the exterior remains compact. In addition, the tube format is compatible with commonly available 30 mm mounting systems, although correct mount height and spacing should always be checked before installation.
Unlike larger long-range-style optics, the compact Airmax format is designed to reduce unnecessary bulk. Consequently, the sighting system can be fitted to setups where rail space, overall balance, or scope length must be considered carefully.
Compact Construction
The shortened optical body is one of the defining characteristics of the Hawke 30 SF Compact IR Airmax, Ill. AMX. Instead of extending the main tube unnecessarily, the internal components are arranged to maintain useful adjustment features within a reduced housing.
This layout can be particularly relevant when accessories, loading ports, magazine systems, or mounting hardware occupy additional rail space.
Illuminated AMX Reticle
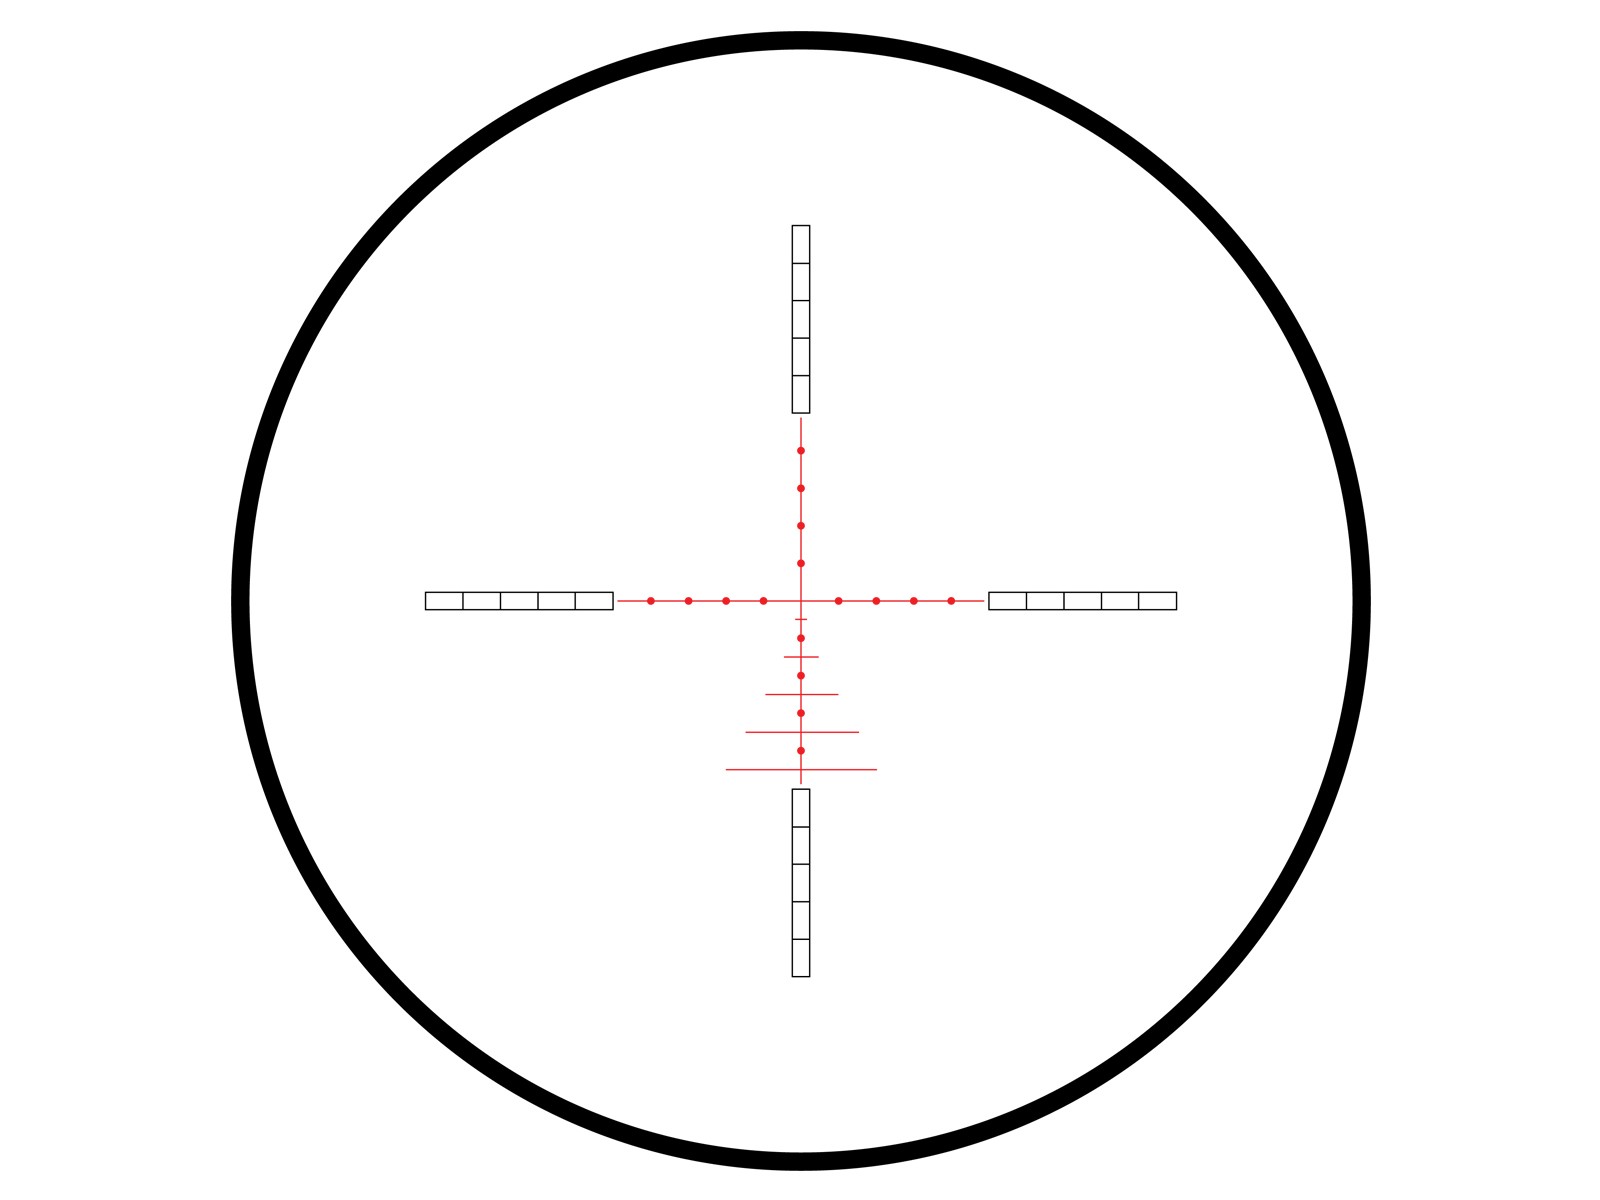
At the center of the optical system is the illuminated AMX reticle. The reticle pattern contains multiple reference markings rather than relying solely on a basic central crosshair. Therefore, additional aiming references are available for users who need to account for changes in distance or trajectory.
Illumination is incorporated so that the central reference area can remain visible when background contrast is reduced. However, illumination should normally be adjusted only to the level required for visibility. Excessive brightness can cause the reticle to dominate the target image.
Multiple Reference Points
The AMX layout is designed around structured spacing. Consequently, each marking can provide a repeatable visual reference once the scope has been properly zeroed and the user understands the trajectory of the chosen setup.
Because trajectory varies according to projectile characteristics, velocity, environmental conditions, and zero distance, the reticle markings should not automatically be treated as fixed distance indicators. Instead, their practical relationship to distance should be established through controlled testing.
Side-Focus Adjustment
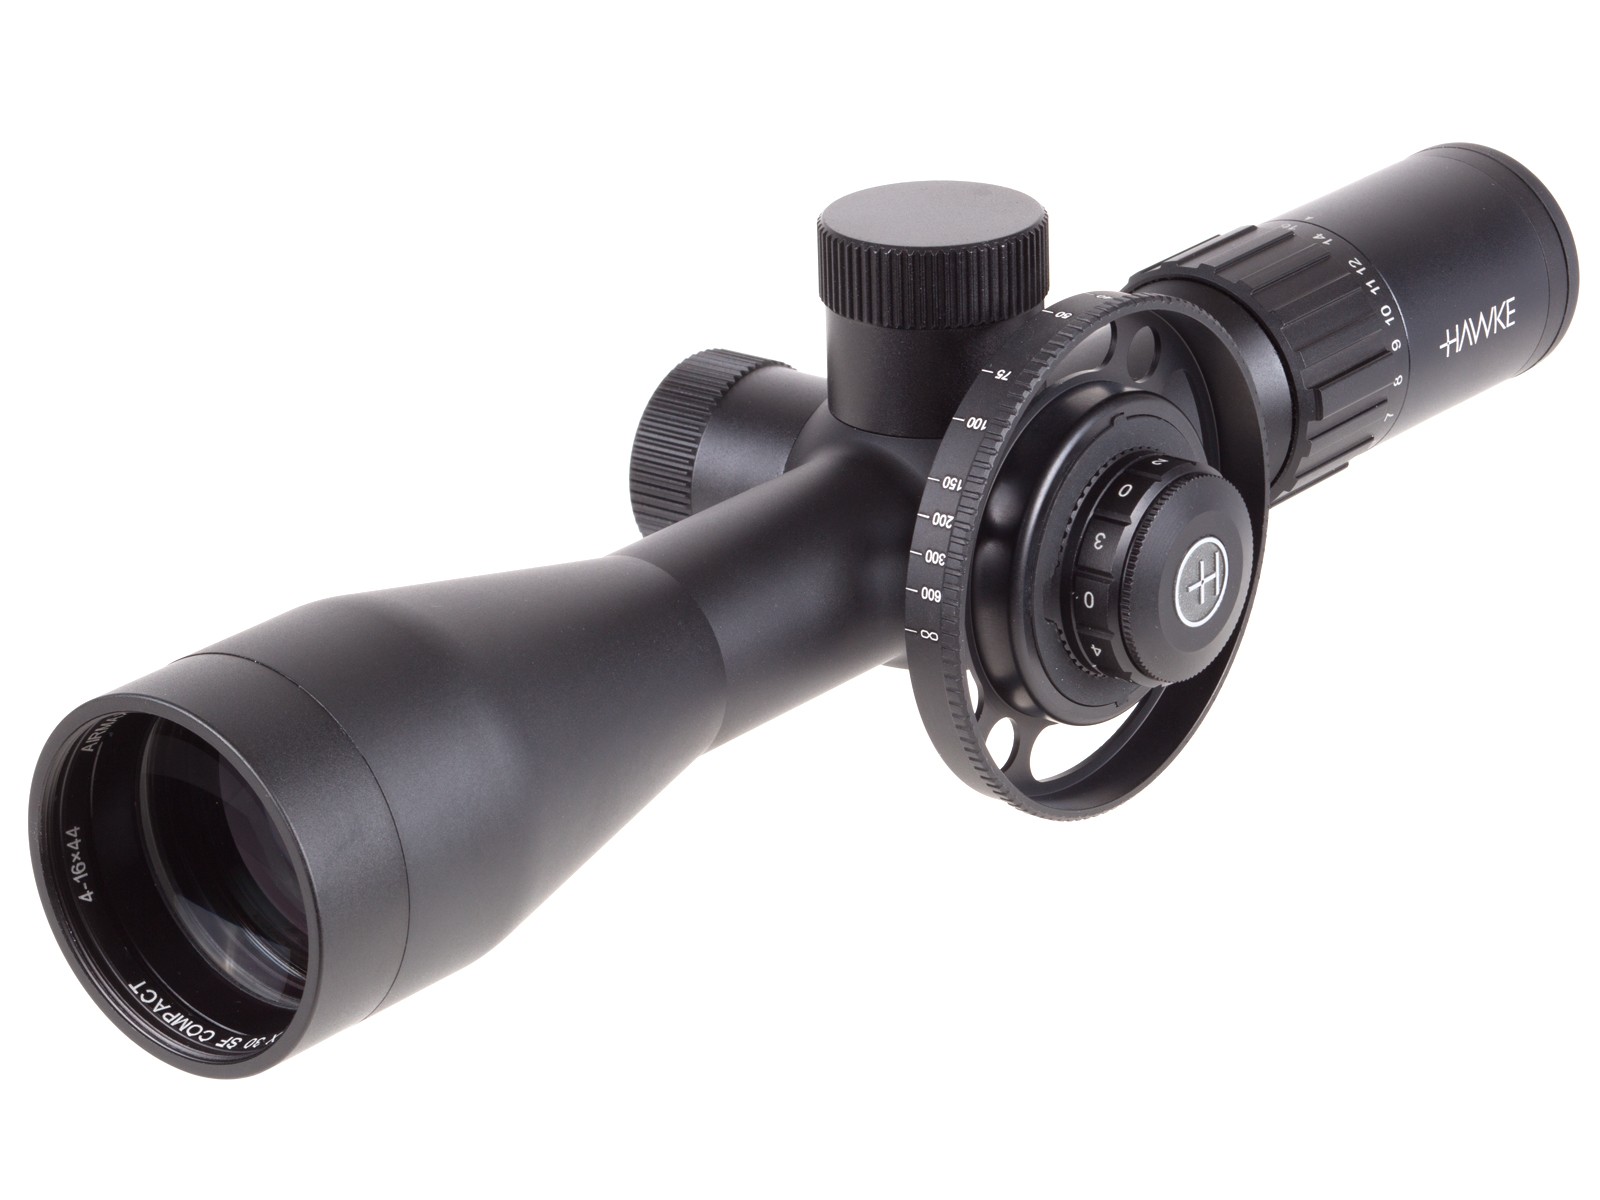
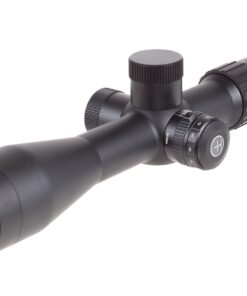
A side-focus control is positioned on the scope body. Through this control, the optical system can be adjusted so that the target image and reticle are more closely aligned within the same focal plane.
Parallax error may occur when the target image is not correctly focused relative to the reticle. Therefore, side-focus adjustment can be useful when accurate observation is required at changing distances.
Rather than requiring adjustment at the objective bell, the side-focus control can be reached from the central turret area. As a result, the user can make optical corrections while maintaining a relatively stable viewing position.
Parallax and Image Clarity
Although side focus is frequently associated with image sharpness, its primary function involves parallax correction. Nevertheless, a correctly adjusted side-focus setting will often result in a sharper target image at the selected distance.
For best results, the ocular focus should first be adjusted so that the reticle appears sharp. Afterward, side focus can be set according to the target distance.
Optical Clarity and Light Transmission
The optical system of the Hawke 30 SF Compact IR Airmax, Ill. AMX is designed to provide a clear image across its usable magnification range. Lens coatings are applied to reduce unwanted reflection and improve transmitted light.
As magnification is increased, field of view generally becomes narrower. Therefore, lower magnification settings can be useful for initial target acquisition, while higher settings provide greater visual detail.
Image quality can also be affected by atmospheric conditions. Heat shimmer, haze, low light, and moisture may reduce perceived clarity regardless of the optical system being used.
Turret Adjustment System
External adjustment turrets are incorporated for windage and elevation correction. Through these controls, the reticle position can be aligned with the actual point of impact during the zeroing process.
Once the scope has been installed correctly, initial alignment should be carried out in a controlled environment. Adjustment values should also be recorded so that future corrections can be made consistently.
Windage and Elevation
Elevation adjustment moves the point of aim vertically, while windage adjustment controls horizontal alignment. Because mechanical adjustment systems operate within a defined range, correct mounting is important.
A scope that requires extreme turret correction after installation may indicate a mounting or alignment issue rather than an optical problem.
Key Features of the Hawke 30 SF Compact IR Airmax, Ill. AMX
- 30 mm main tube for a robust and commonly supported mounting format
- Compact optical housing designed to reduce overall scope length
- Illuminated AMX reticle with multiple visual reference markings
- Side-focus adjustment for parallax correction
- Windage and elevation turrets for controlled zeroing
- Adjustable ocular focus for reticle clarity
- Multi-coated optical surfaces intended to improve light transmission
- Variable magnification configuration, depending on the specific model
- Structured reticle markings for repeatable aiming references
- Centralized adjustment controls for convenient access
Mounting Considerations
Correct installation is important for maintaining optical alignment. Before the Hawke 30 SF Compact IR Airmax, Ill. AMX is mounted, the available rail length, ring spacing, and objective clearance should be checked.
The scope should sit at a height that allows a natural viewing position. If it is mounted too high or too low, consistent eye alignment may become more difficult.
Ring screws should also be tightened evenly according to the mounting-system manufacturer’s specifications. Excessive torque can place unnecessary pressure on the scope tube.
Eye Position and Reticle Alignment
A consistent eye position helps improve repeatability. Therefore, the scope should be positioned so that a complete sight picture can be obtained naturally.
If dark edges appear around the image, the eye may be positioned outside the optimal viewing area. Correct eye relief should be established before the rings are fully tightened.
Reticle alignment should also be checked carefully. A visibly tilted reticle can make vertical and horizontal corrections more difficult to interpret.
Care and Maintenance
Optical surfaces should be kept free from abrasive dirt and debris. Before a lens is wiped, loose particles should be removed with an appropriate blower or soft lens brush.
A clean microfiber lens cloth may then be used for light cleaning. Harsh household cleaners should be avoided unless they are specifically approved for coated optical surfaces.
Turret caps, illumination controls, and adjustment mechanisms should also be checked periodically. If the scope has been exposed to moisture, the exterior should be dried before long-term storage.
Understanding the AMX Reticle in Practice
The illuminated AMX reticle is most useful when its markings are understood in relation to the actual ballistic behavior of the chosen setup. Therefore, reticle references should be verified rather than assumed.
A practical reference chart can be created by recording where each reticle mark corresponds at selected distances. Once verified, those values can provide a consistent visual system for future use.
Lighting conditions should also be considered. During bright daylight, illumination may be unnecessary. In darker environments, a low illumination level may make the central reference point easier to identify without obscuring surrounding detail.
A Compact and Feature-Focused Optical Design
The Hawke 30 SF Compact IR Airmax, Ill. AMX combines a compact 30 mm construction with side focus, an illuminated AMX reticle, and conventional windage and elevation adjustment. Rather than emphasizing size alone, the design brings several optical and mechanical functions into a comparatively short housing.
For users evaluating this type of optic, important considerations include mounting compatibility, eye relief, magnification requirements, reticle preference, adjustment range, and intended viewing distance. When these factors are matched correctly, the scope’s side-focus system, reticle structure, and compact format can be used more effectively.
Ultimately, the Hawke 30 SF Compact IR Airmax, Ill. AMX should be assessed as a complete optical system. Proper installation, careful zeroing, accurate parallax adjustment, and correct interpretation of the AMX reticle all contribute to consistent performance and clear target observation.
Premium Rangefinding Binoculars, Precision Riflescopes and Advanced Hunting Optics
Modern optical technology gives hunters, sport shooters, wildlife observers, and outdoor enthusiasts more ways to identify distant targets, measure range, and achieve a clearer field of view. Premium Leica rangefinder binoculars remain highly regarded for combining observation and ranging technology in one compact optical platform. Popular searches include Leica Geovid 10×42 rangefinder binoculars, Leica Geovid binoculars, Leica binoculars with rangefinder, Leica Geovid Pro 10×42, and Geovid Pro 10×42. Whether someone is researching a Leica Geovid rangefinder, Leica Geovid Pro rangefinder binoculars, Leica Geovid rangefinder binoculars, or the classic Leica Geovid 10×42, the Geovid family is commonly associated with high-quality glass, strong optical clarity, and practical long-distance observation.
Beyond rangefinding models, the wider Leica binoculars collection appeals to users searching for Leica small binoculars, binoculars Leica, Leica Geovid binos, Leica bino, Leica binoculars for sale, Leica bino rangefinder, Leica camera binoculars, Leica binos, or simply a Leica binocular for travel, field observation, wildlife viewing, and outdoor use. Different magnification formats, including 10×40, can suit users who want a balance between detail, portability, and field of view.
Alternative electronic binocular technologies are also becoming increasingly popular. Searches for SIG Sauer binoculars, SIG self stabilizing binoculars, SIG Sauer binos, SIG binoculars, SIG image stabilizing binoculars, SIG binocular, and SIG auto stabilizing binoculars reflect growing interest in electronically assisted viewing. Likewise, SIG Sauer self stabilized binoculars and SIG Sauer image stabilized binoculars can appeal to users who want reduced visual movement during handheld observation. Some buyers may also encounter broader search variations such as Sigma binoculars or specification terms like 11.5ee while comparing different optical products.
Precision aiming optics occupy another major part of the premium optics market. A Zeiss red dot offers a different sighting concept from traditional magnified optics, while the Nightforce ATACR line is frequently researched by users interested in premium long-range scopes. Common variants include Nightforce ATACR 5-25×56 F2, Nightforce ATACR 4-20×50, Nightforce ATACR 5-25×56 F1, and Nightforce ATACR 4-16×50. Related searches such as Night Force ATACR, ATACR scope, Nightforce attacker, ATACR 4-20, and Nightforce ATACR 4 20×50 F1 often appear when buyers are comparing magnification ranges, focal-plane configurations, turret systems, and optical performance.
At the higher end of precision optics, Tangent Theta products are frequently associated with specialist applications requiring refined mechanical adjustment and premium optical performance. Users may search for Tangent Theta scopes, Tangent scope, Tangent scopes, Theta optics, Tangent Theta scope, and Tangent optics while researching high-performance long-range systems.
The market also includes companies such as Fierce Firearms, Fierce Arms, and Fierce Optics, which may appear in searches involving hunting equipment and optical accessories. Within the Athlon category, meanwhile, one of the more detailed product searches is Midas TAC Gen2 HD 6-24×50 APLR15 FFP MOA reticle riflescope. The broader Athlon Midas TAC family, including Athlon Midas TAC 6-24×50, is often considered by users who want substantial magnification and adjustable target-focused features.
For shooters comparing larger objective and magnification configurations, terms such as 34 56, 34×56, Athlon Argos BTR Gen2 8-34×56, Athlon BTR Gen 2, Athlon Argos BTR Gen2, Athlon Argos BTR, and Athlon Argos BTR Gen 2 commonly appear during product research. Search variations such as Athalon scopes and Athens scope may also lead shoppers toward Athlon products when researching a new gun scope, Icarus scope, longest range scope, or general hunting optic.
Anyone learning how to buy a rifle scope should compare magnification range, objective diameter, reticle design, adjustment system, eye relief, optical quality, focal-plane configuration, overall weight, and intended sporting application. Terms such as AO scope can refer to adjustable-objective configurations, while models in the Athlon Ares BTR family provide additional options for users exploring precision-oriented optics.
Mid-range magnification searches frequently include 2.5×15, Avalon Aries, 2.5/15, Athlon BTR Gen 2, Athlon scopes review, Athlon reticles, 2.5-15 scope, and repeated comparisons involving Athlon Argos BTR Gen2 8-34×56 or 34×56 configurations. These searches demonstrate how buyers often compare reticles, magnification ratios, objective sizes, and scope families rather than selecting an optic solely by maximum magnification.
Low-power variable optics are another major category. Searches such as 1 10 scope, Ares ETR 1 10, 1 10 LPVO, 1-10 LPVO, 1-10 FFP LPVO, 1×10 scope, Athlon ETR, LPVO 1-8, LPVO 1-10, and 1-10 rifle scope reflect demand for versatile magnification systems. An LPVO allows users to move between low magnification for a broad field of view and higher magnification for improved observation at extended distances, making the format useful across several sporting disciplines.
For greater magnification, the Ares ETR Gen2 UHD 4.5-30×56 APRS12 FFP IR MIL reticle represents another precision-focused configuration within the Athlon range. Related product searches include Athlon 4.5-30×56, 4.5 30, Athlon ETR, and 4.5/30. The large 56 mm objective and broad magnification range make this type of optic particularly relevant to users comparing long-distance target and field optics.
Other searches such as 14×44, 2s14, Athlon BTR 2-12, 1/2×42, Athlon BTR Gen 2, 12×4.2, 2-12x, and Athlon 2 demonstrate continued demand for more compact variable-magnification formats. A 2-12x configuration, for example, can provide a useful compromise between field of view and magnified observation without requiring the size or weight of a very high-magnification optic.
Ultimately, premium optics cover far more than a single product category. Leica rangefinder binoculars and Leica Geovid binoculars combine observation with distance measurement, while stabilized SIG Sauer binoculars emphasize steady handheld viewing. Meanwhile, Nightforce ATACR, Tangent Theta scopes, and Athlon families such as the Midas TAC, Argos BTR, Ares BTR, and Ares ETR provide a wide range of magnification, reticle, and focal-plane options. By comparing optical clarity, magnification range, objective diameter, reticle format, adjustment system, physical dimensions, and intended sporting use, buyers can narrow a broad optics market into products that better match their individual requirements.
Frequently Asked Questions
1. What is the main purpose of this compact riflescope?
This optic is designed to provide a combination of variable magnification, side-focus adjustment, an illuminated reticle, and a relatively compact overall body. Its configuration is intended to support precise target observation while keeping the scope shorter than many conventional full-length models.
The compact construction can be especially useful where mounting space is limited or where a lighter, less bulky optical setup is preferred. At the same time, the internal adjustment system, reticle design, and focusing controls are intended to provide the functionality normally expected from a more feature-rich optical sight.
2. What does “SF” mean on this scope?
“SF” generally refers to Side Focus. This means that the parallax and target-focus adjustment is controlled from a dial positioned on the side of the scope body rather than at the objective lens.
Side focus allows the user to adjust the optical system while remaining behind the scope. When properly set for the target distance, parallax error can be reduced and the target image can usually be viewed with improved sharpness.
Because different shooting distances may require different settings, side focus can be particularly useful when targets are positioned at varying ranges.
3. What does “IR” mean?
“IR” means Illuminated Reticle.
An illuminated reticle uses a small internal light source to make selected parts of the reticle easier to see. This can be helpful when the target or background does not provide enough contrast for a standard black reticle.
The illumination system should normally be used at the lowest comfortable brightness level. If it is set too brightly, excessive light may reduce fine reticle definition or distract from the target image.
Battery condition should also be checked periodically so that the illumination remains available when required.
4. What is an AMX reticle?
The AMX reticle is a structured aiming design containing multiple reference points in addition to the central aiming point.
These markings can be used as consistent visual references once the optic has been zeroed and the trajectory of the selected setup has been established. Rather than treating each marking as an automatic fixed-distance reference, the user should confirm how the markings correspond with actual impact points at known distances.
This approach is important because projectile trajectory can vary considerably depending on velocity, projectile weight, atmospheric conditions, zero distance, and other variables.
5. Why are there several markings below the center of the reticle?
The additional markings are designed to provide repeatable reference points. After the system has been tested at different distances, a user can record which reference corresponds most closely to a particular point of impact.
These markings can also support more consistent visual measurement and correction when the target is positioned away from the original zero distance.
However, the markings do not replace proper setup and verification. Their practical meaning should always be determined through controlled testing rather than assumption.
6. What are the benefits of a 30 mm main tube?
A 30 mm main tube provides additional internal space for the scope’s adjustment mechanism when compared with some narrower tube designs.
The tube diameter may also allow a useful range of windage and elevation correction, depending on the specific model and internal construction.
Another advantage is mounting compatibility. A wide variety of 30 mm rings and mounts are available. Nevertheless, the correct ring height, rail type, and mounting spacing should always be confirmed before installation.
The larger tube does not automatically mean that the image will appear brighter. Optical brightness depends on several factors, including lens quality, coatings, objective size, magnification, and environmental lighting.
7. Why is the scope described as compact?
The term “compact” refers primarily to the reduced overall length of the optic.
A shorter housing can help when rail space is limited or when other equipment must be positioned around the scope. It can also contribute to a more balanced overall setup.
Compact dimensions do not necessarily mean that adjustment features have been removed. Side focus, illumination, variable magnification, and turret controls can still be incorporated within a shorter body.
Before installation, however, ring placement should be checked carefully because a compact scope may provide less uninterrupted tube space than a longer model.
8. How should the side-focus adjustment be used?
The side-focus dial should be adjusted while viewing the target through the scope.
First, the reticle itself should appear clearly focused. Then the side-focus control can be adjusted until the target image becomes sharp and parallax movement is minimized.
To check for parallax, the user’s eye can be moved slightly behind the scope without moving the optic itself. If the reticle appears to shift significantly across the target, additional side-focus adjustment may be required.
Distance markings on a focus dial should generally be treated as reference points rather than absolute measurements, because individual eyesight and environmental conditions can affect the precise setting.
9. What is parallax error?
Parallax error occurs when the reticle and target image are not effectively aligned within the same optical plane.
If the user’s eye moves slightly from the ideal viewing position, the reticle may appear to move across the target even though the scope itself has not moved.
At shorter distances or higher magnification, this effect can become more noticeable. Correct side-focus adjustment helps reduce this apparent movement.
Consistent eye position remains important even when parallax has been correctly adjusted.
10. How should the ocular focus be adjusted?
The ocular or eyepiece focus is used primarily to make the reticle appear sharp to the viewer’s eye.
A useful method is to look briefly through the scope against a plain background and adjust the eyepiece until the reticle appears immediately crisp. Looking through the optic for too long during this adjustment can allow the eye to compensate naturally, making it more difficult to find the correct setting.
Once the reticle appears sharp, the ocular adjustment should normally require little further alteration unless the scope is used by someone with different eyesight.
11. What is the purpose of variable magnification?
Variable magnification allows the target image to be enlarged or reduced according to viewing conditions and distance.
At lower magnification, a wider field of view is normally available. This can make it easier to locate and observe a target.
Higher magnification can provide more visible detail. However, field of view becomes narrower and movement may appear more pronounced.
Increasing magnification can also make atmospheric effects such as heat shimmer more noticeable. Therefore, the highest available magnification is not always the clearest or most practical setting.
12. Does higher magnification always provide better accuracy?
No. Higher magnification can make small target details easier to see, but it does not automatically improve mechanical accuracy.
At high magnification, natural movement becomes more visible, field of view is reduced, and optical distortions caused by atmospheric conditions can become easier to notice.
A moderate magnification setting may sometimes provide a clearer and steadier image.
The most suitable setting depends on the target size, distance, lighting, stability of the platform, and the amount of surrounding area that needs to remain visible.
13. How should the illuminated reticle be adjusted?
Illumination should generally be kept as low as practical while still allowing the reticle to remain visible.
In bright conditions, illumination may not be needed at all. In darker environments or against low-contrast backgrounds, a modest illumination level can improve reticle visibility.
If the brightness is set excessively high, glare may appear around the illuminated portion of the reticle. This can reduce precision and make the central aiming area less clearly defined.
The illumination should therefore complement the sight picture rather than dominate it.
14. Does the illuminated reticle work without a battery?
The reticle itself can generally still be viewed without illumination because the etched or printed aiming structure remains present.
The battery is required only to power the illuminated portion of the reticle.
Consequently, a depleted battery does not necessarily make the optic unusable, although the illuminated feature will no longer function until the battery is replaced.
Battery size and replacement procedures should be confirmed in the manufacturer’s documentation for the specific model.
15. How should the scope be mounted?
The correct mounting process starts with compatible 30 mm rings or a suitable mount.
The rings should be positioned so that the optic is properly supported without interfering with the turret housing or adjustment controls. Eye relief should then be established before the rings are fully tightened.
The reticle should be leveled carefully, and ring screws should be tightened evenly.
Over-tightening should be avoided because excessive pressure can potentially place stress on the scope tube or internal optical components.
Manufacturer torque specifications should be followed whenever they are available.
16. Why is correct eye relief important?
Eye relief determines the distance between the user’s eye and the rear lens at which a complete field of view can be seen.
If the eye is too close or too far away, dark shadows may appear around the image.
Consistent eye relief also helps improve repeatability. When the optic is positioned correctly, the user should be able to obtain a complete sight picture without having to move their head unnaturally forward or backward.
The final mounting position should therefore be established from the user’s normal viewing posture.
17. What do the windage and elevation turrets control?
The elevation turret controls vertical reticle adjustment, while the windage turret controls horizontal adjustment.
These controls are used when aligning the optic with the actual point of impact during setup.
Each adjustment corresponds to a defined angular value, depending on the model. The exact click value should be confirmed from the manufacturer’s specifications.
Keeping a record of adjustments can make future setup checks and corrections easier.
18. Why might a scope require too much turret adjustment?
If an unusually large amount of adjustment is required, the cause may be related to mounting alignment rather than the optic itself.
Possible factors can include incorrectly installed rings, incompatible mounting hardware, rail misalignment, or a mount that is not positioned properly.
Using the extreme edge of the internal adjustment range can reduce the amount of correction available in another direction.
Therefore, the mounting system should be inspected whenever excessive turret adjustment appears necessary.
19. How should the lenses be cleaned?
Loose dust should first be removed using an optical blower or a soft lens brush.
A clean microfiber lens cloth can then be used to remove fingerprints or light smudges. If additional cleaning is required, a solution formulated specifically for coated optical lenses should be used.
Paper towels, rough fabrics, and strong household cleaning products should be avoided because they may damage protective lens coatings.
Lens caps can also help reduce unnecessary exposure to dirt and debris during transportation and storage.
20. How should the scope be stored?
The optic should be stored in a dry environment away from excessive heat, moisture, and corrosive materials.
If the exterior becomes wet, it should be dried before long-term storage. Lens covers may then be fitted once the optical surfaces are clean and dry.
The illumination control should also be checked before storage. Where appropriate, the battery may be removed during very long storage periods to reduce the risk of battery leakage.
A protective case can provide additional protection during transportation.
21. Can temperature affect optical performance?
Yes. Temperature changes can influence both the environment around the optic and the appearance of the target image.
Rapid movement between cold and warm environments may cause temporary external condensation. Heat from the ground or surrounding surfaces can create visible atmospheric distortion at longer viewing distances.
Temperature can also affect battery performance.
For this reason, changes in optical appearance should not immediately be interpreted as a mechanical problem with the scope.
22. How often should mounting screws be checked?
Mounting hardware should be inspected periodically, particularly after initial installation or after the optic has been transported frequently.
Screws should not simply be tightened repeatedly without reference to the manufacturer’s torque specifications. Excessive tightening can damage threads, mounting components, or the scope tube.
Instead, the mounting system should be checked for visible movement or loosening.
If a screw repeatedly becomes loose, the underlying cause should be identified rather than continuously increasing torque.
23. Why is a clear reticle important before adjusting side focus?
The reticle and target focus are controlled by different adjustments.
The ocular focus is responsible for making the reticle appear clear to the viewer. The side-focus dial is then used primarily to correct parallax and bring the target image into proper focus.
If the ocular adjustment has not been set correctly, repeated changes to the side-focus control may not solve the underlying issue.
Therefore, reticle focus should normally be established first.
24. What should be checked before using the optic after installation?
Several basic checks should be completed.
The scope should be firmly secured without excessive ring pressure. Eye relief should be comfortable, the reticle should be level, and the ocular focus should provide a sharp reticle image.
The side-focus control should move normally, and the illumination system should function correctly.
Windage and elevation adjustments should also operate consistently.
Finally, the mounting hardware should be inspected again after the initial setup period to ensure that nothing has shifted.
25. What makes this type of optical design useful?
The main advantage of the design is the integration of several adjustment features within a relatively compact housing.
Side focus provides control over parallax, variable magnification allows the visible target size to be adapted, and the structured illuminated reticle provides multiple reference points.
A 30 mm tube also supports a commonly used mounting format.
The effectiveness of the system ultimately depends on correct installation, proper optical adjustment, consistent eye position, and an accurate understanding of how the reticle references relate to the chosen setup.
Frequently Asked Questions
1. What is the main purpose of this compact riflescope?
This optic is designed to provide a combination of variable magnification, side-focus adjustment, an illuminated reticle, and a relatively compact overall body. Its configuration is intended to support precise target observation while keeping the scope shorter than many conventional full-length models.
The compact construction can be especially useful where mounting space is limited or where a lighter, less bulky optical setup is preferred. At the same time, the internal adjustment system, reticle design, and focusing controls are intended to provide the functionality normally expected from a more feature-rich optical sight.
2. What does “SF” mean on this scope?
“SF” generally refers to Side Focus. This means that the parallax and target-focus adjustment is controlled from a dial positioned on the side of the scope body rather than at the objective lens.
Side focus allows the user to adjust the optical system while remaining behind the scope. When properly set for the target distance, parallax error can be reduced and the target image can usually be viewed with improved sharpness.
Because different shooting distances may require different settings, side focus can be particularly useful when targets are positioned at varying ranges.



Reviews
There are no reviews yet.